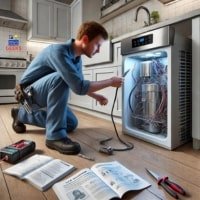
How to hook up an ice maker
Ice makers are essential appliances for many households, providing a convenient way to produce a consistent supply of ice. Whether it’s for everyday use or for entertaining, having an automatic ice maker is a huge time-saver. However, hooking up an ice maker requires proper planning and execution to ensure it functions properly without leaks or other issues.
By following this guide, you will learn how to hook up your ice maker quickly and efficiently, ensuring a steady flow of ice at all times.
How to hook up an ice maker
Before you begin the installation process, it’s important to gather all the necessary tools and materials. Here’s a list of items you’ll need to hook up an ice maker:
- Ice maker kit (if not included with your refrigerator)
- Water supply line (plastic, copper, or braided stainless steel)
- Water valve (saddle valve or dedicated shut-off valve)
- Teflon tape or plumber’s tape
- Adjustable wrench
- Drill and drill bits (if necessary)
- Bucket or towel to catch water
- Screwdriver (optional)
Now that you have everything ready, let’s move on to the installation process.
Step 1: Turn Off the Water Supply
Before starting any installation, always ensure that the water supply is turned off. Locate the nearest shut-off valve to where your ice maker will be installed. This is usually found under the sink or behind the refrigerator. If there is no shut-off valve, you may need to turn off the main water supply to your house. Once the water is off, drain any excess water from the pipes by turning on a nearby faucet.
Step 2: Locate the Water Source
Identify where you will be connecting the water supply for the ice maker. You’ll either use an existing water line from your kitchen sink or install a new line directly from your home’s plumbing system. If you don’t have a pre-existing water line near the refrigerator, you may need to run a new water supply line to the refrigerator from the nearest cold water source.
Types of Water Supply Lines
There are a few types of water supply lines you can use to hook up your ice maker:
- Plastic Tubing: This is the most budget-friendly option but is prone to kinking and damage.
- Copper Tubing: A more durable choice that resists kinking, making it a reliable option for long-term use.
- Braided Stainless Steel: The most expensive but highly durable option. It offers flexibility and durability without the risk of kinking.
Step 3: Install the Water Valve
If your refrigerator doesn’t already have a dedicated water valve, you’ll need to install one. There are two main types of water valves to choose from:
Type 1. Saddle Valve:
This is a popular option for ice maker installations because it’s easy to install without requiring a lot of plumbing work. To install a saddle valve:
- Position the valve over the cold water pipe where you want to connect the water supply.
- Use the included clamp to secure the valve to the pipe.
- Tighten the saddle valve by turning the valve handle, which will pierce the pipe and allow water to flow through the valve.
Type 2. Dedicated Shut-Off Valve:
This is a more permanent solution and may require a plumber to install. It allows for easier water shut-off and can be more reliable than a saddle valve. This valve is connected directly to the water supply line and provides a dedicated shut-off point for your ice maker.
Step 4: Run the Water Supply Line
Now that you have a water valve installed, it’s time to run the water supply line to the refrigerator. Depending on the type of tubing you’ve chosen, this process may vary slightly.
Steps for Running the Water Supply Line:
- Measure and cut the supply line to the necessary length, ensuring you have enough tubing to reach from the valve to the back of the refrigerator.
- Attach one end of the water supply line to the water valve. Use Teflon tape to ensure a tight, leak-free connection.
- Run the supply line from the water valve to the refrigerator, being careful not to kink or bend the tubing.
- Use clips or clamps to secure the tubing along the wall or under cabinets to keep it out of the way and prevent damage.
Step 5: Connect the Water Line to the Refrigerator
Once you have the water supply line in place, it’s time to connect it to your refrigerator’s ice maker.
Connecting the Water Line:
- Locate the water inlet valve at the back of the refrigerator. This is where the water line will connect to supply water to the ice maker.
- Attach the water supply line to the water inlet valve, using an adjustable wrench to tighten the connection. Be sure to use Teflon tape or plumber’s tape to prevent any leaks.
- Double-check all connections to ensure they are tight but avoid over-tightening, as this could damage the tubing.
Step 6: Turn the Water Supply Back On
Now that everything is connected, it’s time to turn the water supply back on. Slowly open the shut-off valve to allow water to flow through the line and into the refrigerator.
Checking for Leaks:
- Once the water is flowing, carefully inspect all connections for any signs of leaks.
- If you notice any drips or water around the connections, tighten them slightly or apply additional Teflon tape to create a better seal.
- Let the water run for a few minutes to flush out any debris or air from the supply line.
Step 7: Test the Ice Maker
With the water supply connected and no leaks detected, you can now test the ice maker to ensure it’s working correctly.
How to Test the Ice Maker:
- Plug the refrigerator back into the power outlet and turn it on.
- Wait for the ice maker to cycle through and begin producing ice. This can take a few hours, as the ice maker needs time to cool down and freeze the water.
- Once ice starts being produced, check the ice cubes for size and clarity. Adjust the water supply if necessary to get the desired ice quality.
Troubleshooting Common Ice Maker Installation Problems
Even with careful installation, issues can arise. Here are some common problems and their solutions:
Water Leaks:
If you notice any water leaks, recheck the connections at both the water valve and refrigerator. Ensure that the Teflon tape is applied correctly, and all connections are tight.
No Ice Production:
If your ice maker is not producing ice, ensure that the water supply is fully open and that the refrigerator is properly plugged in. Additionally, make sure the ice maker’s arm or switch is in the “on” position.
Slow Ice Production:
If your ice maker is producing ice too slowly, it could be due to low water pressure. Check the water valve and supply line for any blockages or restrictions that may be affecting water flow.
Small or Misshaped Ice Cubes:
If the ice cubes are smaller than expected or misshaped, you may need to adjust the water supply. Make sure the water line is not kinked and that the valve is fully open.
Maintenance Tips for Your Ice Maker
To keep your ice maker running smoothly, follow these maintenance tips:
- Regularly clean the ice maker: Remove any buildup of ice or debris from the ice tray and water line.
- Replace the water filter: Many refrigerators with ice makers have water filters that should be replaced every 6 months.
- Check for leaks: Periodically inspect the water line and connections for any signs of leaks.
Conclusion
Installing and hooking up an ice maker doesn’t have to be a complicated task. By following the step-by-step guide provided above, you can have your ice maker up and running in no time, providing a steady supply of ice for your household. Make sure to follow all the steps carefully, and don’t hesitate to consult a professional if needed.
With the right tools, knowledge, and patience, you’ll enjoy the convenience of having a fully functional ice maker in your home.


