How To Install A Wall Oven
Installing a wall oven can seem like a daunting task, but with the right guidance, it becomes a manageable DIY project. This comprehensive wall oven installation guide will walk you through every step, ensuring your oven is installed safely and correctly. From understanding wall oven installation requirements and selecting the right tools to mastering the wall oven electrical installation, we’ll cover it all. Whether you’re installing a wall oven and microwave combo, working with a double wall oven, or tackling the installation by yourself, this guide will provide you with step-by-step wall oven installation instructions.
How To Install A Wall Oven
We will discuss here steps on how we can install a wall oven:
Step 1: Remove the Old Oven
If you are replacing an existing wall oven, follow these steps:
- Disconnect Power: Turn off the power supply to the oven.
- Remove Oven Door: This reduces the weight and makes it easier to handle.
- Disconnect Wiring: Carefully disconnect the wiring from the old oven. Use a circuit tester to ensure no power is flowing.
- Remove Mounting Screws: Unscrew the mounting screws holding the oven in place and gently slide it out of the cabinet.
2. Install Electrical Wiring
- Run Wiring: Ensure the wiring runs to the back of the oven installation area.
- Connect Wiring: Match the oven’s wires to the home wiring—typically, red to red, black to black, and white to white. Secure connections with wire nuts and wrap with electrical tape for added safety.
- Ground the Oven: Attach the green or bare wire to the oven’s grounding screw.
3. Mount the Wall Oven
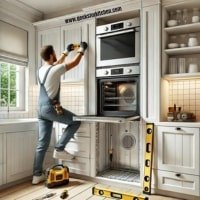
- Slide the Oven Into Place: Carefully slide the oven into the cabinet opening. It may be helpful to have an assistant for this step.
- Check for Level: Use a level to ensure the oven is level both front-to-back and side-to-side.
- Secure the Oven: Attach the mounting screws to secure the oven in place. Ensure the screws are tight but do not over-tighten to avoid damaging the oven or cabinetry.
4. Final Connections
- Reattach the Oven Door: Reattach the oven door if you removed it earlier.
- Turn On Power: Restore power to the oven at the main circuit breaker.
- Test the Oven: Turn on the oven to ensure it’s working properly. Check all functions, including the bake, broil, and timer settings.
Post-Installation Tips
Inspect for Proper Operation: Check that the oven heats evenly and all features work correctly.
Consult the Manual: Refer to the manufacturer’s manual for any specific maintenance or operational instructions.
Schedule Regular Maintenance: Regularly clean the oven and schedule professional maintenance checks to ensure longevity and efficiency.
Maintenance Tips for Your Wall Oven
Regular Cleaning
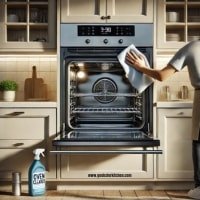
To ensure your wall oven functions optimally, it’s important to keep it clean. Follow the manufacturer’s cleaning guidelines, typically involving a gentle, non-abrasive cleaner. Clean spills and residue immediately to prevent buildup.
Inspect and Maintain Door Seals
Check the door seals regularly for any signs of wear or damage. A good seal ensures efficient cooking and prevents heat from escaping. Replace the seals if they appear worn out or damaged.
Routine Inspections
Perform routine inspections of the oven’s components, such as the heating elements, racks, and controls. Look for any signs of wear or malfunction and address them promptly.
Use the Self-Cleaning Function
If your oven has a self-cleaning function, use it as recommended by the manufacturer. This feature helps remove stubborn grime and can make cleaning easier.
Avoid Using Harsh Chemicals
Avoid using harsh chemicals or abrasive materials that can damage the oven’s interior and components. Stick to mild, oven-safe cleaning solutions.
Professional Servicing
Schedule regular maintenance checks with a professional technician. Annual servicing can help identify potential issues before they become major problems, ensuring your oven operates efficiently.
Check Ventilation
Ensure the oven’s ventilation system is clean and unobstructed. Proper ventilation is crucial for safe operation and optimal performance.
Replace Filters
If your wall oven has filters, check them regularly and replace them as needed. Clean filters improve air quality and oven efficiency.
Handle with Care
When using and cleaning your oven, handle all components with care to avoid damaging delicate parts. Proper handling ensures longevity and reliable performance.
By following these maintenance tips, you can keep your wall oven in excellent condition, ensuring it continues to function efficiently and safely for years to come.
FAQs
Is it possible for me to install a wall oven myself?
Although this may not be your primary type of work or something you’re completely comfortable with, you might be able to perform this installation yourself by working alongside a couple of additional tools and with the help of another person.
Is it necessary to hire an electrician to install a wall oven?
Before tackling the installation yourself, determine whether you have any previous expertise installing electrical equipment and whether you are comfortable working with wires and other plumbing.
It is advisable to get a professional to install your oven for you if possible, as this can be a dangerous undertaking for an inexperienced person.
Conclusion
Installing a wall oven can be a straightforward process if you follow these detailed steps. Ensure you have the right tools and materials, and don’t hesitate to seek professional help for electrical work. With proper installation and maintenance, your wall oven will be a valuable addition to your kitchen, offering enhanced functionality and aesthetic appeal.


